Table of Contents
ToggleOutdoor cooking just hits different when you’ve got a proper setup, and a Blackstone griddle is one of the most versatile tools to build around. With its massive flat-top cooking surface and even heat distribution, a Blackstone turns any backyard into a legit cooking station. Whether you’re flipping pancakes for a crowd or searing fajitas on a Friday night, it’s a workhorse that deserves thoughtful integration into your outdoor space. This guide walks through practical, field-tested ideas for designing an outdoor kitchen around a Blackstone griddle, from simple portable setups to full built-in stations.
Key Takeaways
- A Blackstone griddle offers superior cooking versatility compared to traditional grills with its flat-top surface, even heat distribution, and ability to cook everything from pancakes to fajitas without flare-ups or food falling through grates.
- Built-in Blackstone stations require proper ventilation (3+ inches clearance), non-combustible materials like tile or stone veneer, and dedicated propane lines with local code compliance for safe, permanent outdoor kitchen integration.
- Portable Blackstone cart setups provide flexibility for renters and small spaces by pairing the griddle with rolling prep carts, modular cabinetry, or simple concrete paver bases that can be disassembled if you move.
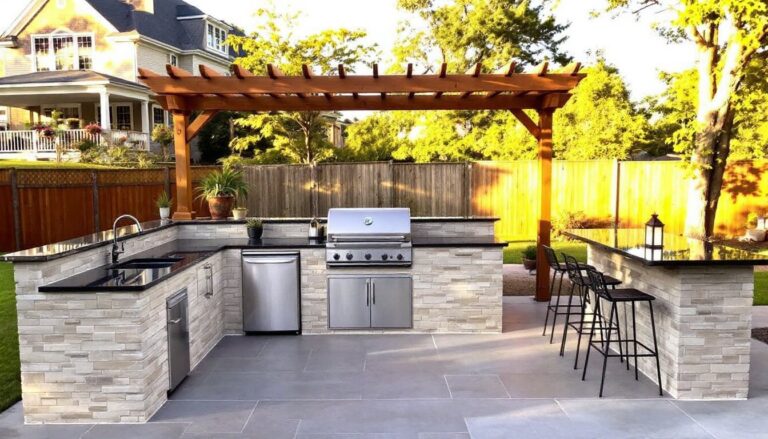
- An island configuration centered around the Blackstone creates a multi-functional outdoor kitchen by combining the griddle with prep counters, sinks, storage, and task lighting within an L- or U-shaped layout.
- Essential features like prep counter space (at least 24 inches on each side), overhead task lighting, hand-washing stations, GFCI outlets, and trash bins transform a standalone Blackstone into a fully functional outdoor kitchen.
- Budget-friendly Blackstone outdoor kitchen projects, such as cinder block islands or gravel pads with standalone components, can be built for $150–$250 and expanded over time without major upfront investment.
Why Blackstone Griddles Are Perfect for Outdoor Kitchens
Blackstone griddles offer a few advantages that make them stand out in the outdoor cooking world. First, the flat-top surface gives you way more usable cooking area than a traditional grill, no food falling through grates, no flare-ups from dripping fat. You can cook eggs, smash burgers, stir-fries, and pancakes all on the same surface.
The even heat distribution across cold-rolled steel means fewer hot spots and more consistent results. Most models range from 17 inches (tabletop units) to 36 inches (full four-burner stations), so there’s a size for every space and budget. Blackstone griddles also heat up fast, within five to ten minutes, and cool down quicker than masonry or built-in grills, which is a plus for cleanup.
Another practical angle: they’re modular. You can start with a basic cart model and later integrate it into a covered outdoor living space or custom island without replacing the entire unit. And because they run on standard 20-pound propane tanks (some models offer natural gas conversion kits), fuel logistics stay simple.
Built-In Blackstone Station Designs
A built-in station gives you a permanent, weather-resistant cooking zone that feels like an extension of your home. The key is treating the Blackstone like an appliance, similar to how you’d frame in a drop-in grill or range.
Start by selecting a Blackstone model designed for built-in use or one that can be safely recessed. The 28-inch and 36-inch griddles work well here. Frame the opening with pressure-treated 2x4s or steel studs if you’re working in a wet climate. Leave at least 3 inches of clearance on all sides for ventilation, propane burners need airflow to prevent carbon monoxide buildup and overheating.
For the surround, use non-combustible materials: stacked stone veneer, concrete board with tile, stucco over metal lath, or poured concrete countertops. Avoid wood directly adjacent to the cooking surface. Many DIYers use cement backer board as a substrate, then finish with porcelain tile or natural stone. According to Bob Vila, outdoor countertop materials should be sealed annually to resist moisture and UV damage.
Run a dedicated propane line if you’re going with natural gas conversion, and check local codes, some jurisdictions require a licensed plumber for gas line work. If sticking with propane tanks, build a ventilated cabinet beneath the griddle with a hinged door for tank access. Don’t forget a drip tray or grease management system routed to an accessible collection point.
Portable Blackstone Cart Setup Ideas
If you’re renting, working with a small patio, or just want flexibility, a portable cart-based Blackstone is the way to go. These setups can be moved for cleaning, stored during winter, or repositioned depending on wind and sun.
The simplest approach: park the Blackstone cart on a level, non-combustible surface, concrete, pavers, or a composite deck with a grill mat underneath to catch grease. Pair it with a rolling prep cart or a small outdoor sideboard for plating and condiments. IKEA’s BROR utility cart or a stainless steel kitchen island on casters both work well and hold up outdoors if kept under a cover.
For a more integrated look without permanent construction, build a modular surround using concrete blocks, landscape pavers, or prefab outdoor cabinetry. Companies like NewAge Products and Sunstone make weather-resistant cabinets that bolt together, no mortar or framing required. You can create an L-shape or U-shape layout, drop the Blackstone into the lineup, and still disassemble everything if you move.
Consider adding a roof or canopy if the cart will live in one spot. A simple 8×8-foot gable roof framed with 4×4 posts and corrugated metal roofing keeps rain off and extends your cooking season. Just ensure posts are set in concrete footings and check if a permit is required for structures over a certain square footage.
Island Configuration with Blackstone Centerpiece
An island layout turns the Blackstone into the star of a multi-functional outdoor kitchen. This works best when you have at least 10 feet of linear space and want to integrate other appliances or work zones.
Start by sketching an L-shape or U-shape footprint. Position the Blackstone on one leg of the L, then add a sink, mini fridge, or built-in cooler on the perpendicular run. Use 12-inch-deep base cabinets (outdoor-rated or marine-grade plywood with exterior paint) for storage underneath. Top everything with a continuous 2-inch-thick concrete countertop or granite slab, both handle heat and weather well.
For the structural base, build a frame from 2×4 pressure-treated lumber on a concrete slab or paver base. Shim and level carefully: a wobbly island makes cooking frustrating. Finish the exterior with stone veneer, stucco, or horizontal wood siding (use cedar or composite for rot resistance).
Run electrical for task lighting, 12V LED strip lights under the countertop overhang work great and are low-voltage enough for DIY installation in most areas. For the sink, you’ll need a water supply line and a gray-water drain. Some folks tie into an irrigation line: others use a gravity-fed 5-gallon jug mounted inside a cabinet. If doing plumbing, consult local codes, outdoor sinks often require backflow prevention.
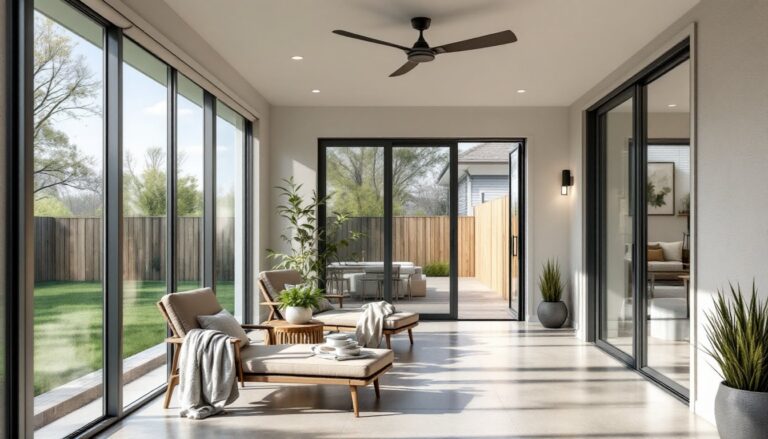
This is where outdoor living structures really shine, providing shelter and defining the kitchen zone.
Essential Features to Include Around Your Blackstone
A griddle alone doesn’t make a kitchen, supporting features turn it into a true cooking zone.
Prep counter space is non-negotiable. Plan for at least 24 inches of countertop on one side of the griddle for raw ingredients and 18 inches on the other for plated food. Use cutting boards designated for outdoor use (plastic or composite, not wood that’ll warp).
Add task lighting overhead. A simple gooseneck lamp mounted to a post or pergola beam, or battery-powered LED puck lights under a cabinet, makes evening cooking safer. Aim for 300–500 lumens per work zone.
Include a hand-washing station, even a small utility sink with a soap dispenser cuts down on trips inside. If plumbing isn’t feasible, a portable hand-wash station with a foot pump (often used at campsites) works in a pinch.
Outdoor-rated electrical outlets (GFCI-protected, weatherproof covers) let you plug in blenders, speakers, or phone chargers. Install at least two 20-amp circuits if adding a mini fridge or pellet grill alongside the Blackstone. Electrical work beyond replacing an outlet typically requires a permit and possibly a licensed electrician, check your local jurisdiction.
Don’t overlook a trash and recycling station. A dual-bin setup tucked into a cabinet or mounted to the side of an island keeps the area clean. Line bins with compostable bags for easy cleanup.
Storage Solutions for Blackstone Accessories
Blackstone cooking generates a pile of accessories: spatulas, squeeze bottles, scrapers, seasoning oils, covers, and the grease cup. Smart storage keeps everything within arm’s reach.
Build or buy a narrow vertical cabinet (6–8 inches deep) next to the griddle for utensils. Magnetic tool bars mounted inside cabinet doors or on the side of an island hold metal spatulas and tongs. Use S-hooks on a rail for squeeze bottles and oven mitts.
For covers and soft goods, a weatherproof deck box (Rubbermaid, Keter, or Suncast brands hold up well) stashed nearby works better than cramming them into a cabinet. Seasoning oils and cleaning supplies go in a locking cabinet if kids or pets are around, some griddle cleaners are caustic.
A dedicated spice rack or condiment caddy keeps frequently used items handy. Outdoor-friendly options include stainless steel or powder-coated steel racks that won’t rust. The Kitchn recommends storing spices in airtight containers and replacing them seasonally, since UV exposure degrades potency.
Budget-Friendly DIY Blackstone Outdoor Kitchen Projects
You don’t need a five-figure budget to build a functional Blackstone outdoor kitchen. Here are a few DIY-friendly projects that deliver results without very costly.
Cinder block island: Stack 8x8x16-inch concrete blocks (about $2 each) in a rectangle or L-shape, dry-stacked or mortared for stability. Cap with a 2×6 cedar frame and a sheet of 3/4-inch exterior plywood topped with peel-and-step vinyl tile or a single sheet of galvanized steel. Total cost: under $200 for a 6-foot island. Leave gaps between blocks for ventilation if the Blackstone sits on top.
Pallet wood surround: Disassemble heat-treated pallets (marked HT, not chemically treated), then rebuild into a three-sided surround with a 2×4 frame. Seal with exterior stain or paint. This works for a cart-style Blackstone, it’s not safe for built-ins due to combustibility. Total cost: under $100 if you source free pallets.
Repurposed furniture: An old dresser or sideboard (solid wood, not particleboard) can become an outdoor prep station. Remove drawers, add wire mesh or slat shelving for ventilation, cut an opening in the top for the griddle, and seal all surfaces with marine-grade spar urethane. Keep the griddle elevated on fireproof supports (steel angle iron or concrete pavers).
Gravel pad + standalone components: Pour a 4-inch gravel base (3/4-inch crushed stone) in a defined area, compact it, then set concrete pavers on top as a cooking platform. Add a Blackstone cart, a utility shelf, and a small potting bench for prep. Total cost: around $150–$250 depending on size. This setup is modular and can grow over time by adding more pavers and components.
For those wanting to invest a bit more, planning a larger premier outdoor living project can tie the Blackstone into a full backyard transformation. Design ideas from Homedit showcase creative layouts that balance cooking zones with lounging and dining areas.
Safety note: Regardless of budget, always use a fire extinguisher rated for grease fires (Class K or multipurpose ABC) within ten feet of any cooking surface. Wear heat-resistant gloves when handling the griddle top, and never move a hot Blackstone, let it cool for at least 30 minutes.
If your project involves creating an outdoor living space from scratch, starting with a Blackstone as the anchor point provides both function and a natural gathering spot. Pair it with simple seating, string lights, and a few potted plants, and you’ve got a backyard kitchen that punches well above its price tag.