Table of Contents
ToggleDeck railings do more than check a code box, they set the tone for your entire outdoor space. Whether you’re planning a full deck rebuild or just swapping out tired balusters, the right railing transforms a basic platform into a polished extension of your home. In 2026, railing options span from classic wood to sleek cable, and the materials you choose will affect maintenance, visibility, cost, and style for years to come. This guide breaks down the most popular railing designs, from timeless wood to modern glass panels, so homeowners can match function with aesthetics without guesswork.
Key Takeaways
- Outdoor deck railing ideas range from classic wood and modern cable to glass panels, each offering distinct advantages in cost, maintenance, and aesthetic appeal for different home styles.
- Wood railings ($15–$50 per linear foot) provide timeless warmth but require sanding and refinishing every 2–3 years, while composite options ($40–$70) eliminate staining with 25-year warranties and soap-and-water cleaning.
- Modern cable and aluminum metal railings deliver clean sightlines and low maintenance, with cable systems requiring precise post drilling and tensioning to 300 pounds of force to meet safety standards.
- Glass panel railings ($150–$300 per linear foot) offer unobstructed views ideal for lakefront or rooftop decks, but installation is labor-intensive and regular cleaning is essential.
- Budget-friendly DIY builds using pressure-treated pine or cattle panel infill can meet code requirements for under $15 per linear foot when you prioritize material shopping and handle the labor yourself.
- All deck railings must meet IRC standards: 36-inch minimum height, 4-inch maximum baluster spacing, and ability to withstand 200-pound concentrated loads to ensure safety and pass inspection.
Classic Wood Railing Designs for Timeless Appeal
Wood railings remain a go-to for traditional homes and decks that prioritize warmth over high-tech finishes. Pressure-treated pine, cedar, and redwood are the workhorses here. Pressure-treated pine offers the lowest upfront cost (around $15–$25 per linear foot installed) but requires annual staining or sealing to prevent rot and splintering. Cedar and redwood bring natural rot resistance and richer grain, though they’ll run $30–$50 per linear foot.
Typical wood railing construction uses 4×4 posts set 6 feet on center (check local code, some jurisdictions require closer spacing), a 2×6 top rail, a 2×4 bottom rail, and 2×2 balusters spaced no more than 4 inches apart to meet IRC guardrail standards. If you’re comfortable with a circular saw and drill, this is a solid weekend DIY. Pre-assemble sections on sawhorses to speed installation.
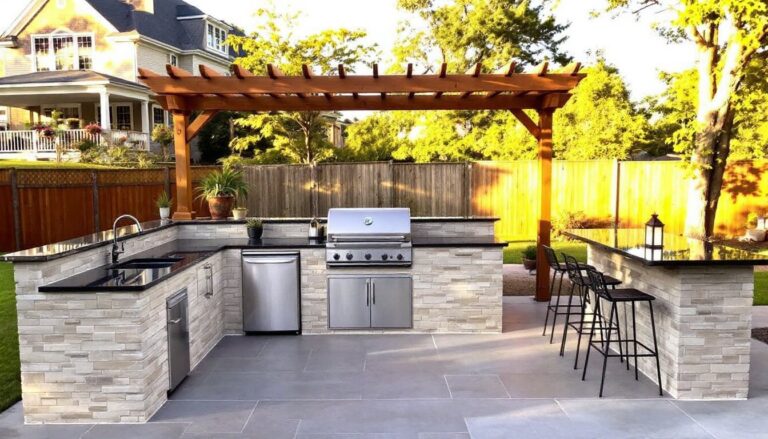
For a twist on the traditional look, consider incorporating outdoor living structures that echo the same wood tones. You can also route a decorative edge on the top rail or add corbels under post caps for extra detail. Just remember: wood demands upkeep. Plan on sanding and refinishing every 2–3 years, or the finish will peel and the wood will gray.
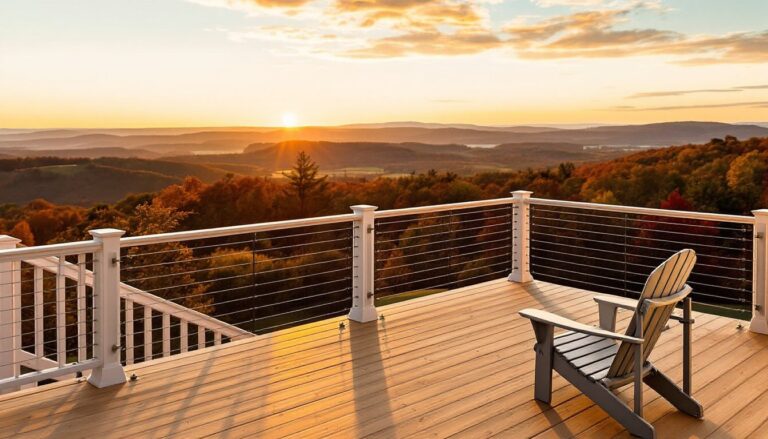
Modern Metal and Cable Railing Options
Metal and cable railings deliver clean sightlines and a contemporary edge, especially on elevated decks with views worth keeping. Aluminum railings are lightweight, powder-coated for durability, and won’t rust, expect to pay $50–$80 per linear foot for pre-fabricated kits. They’re low-maintenance and DIY-friendly: most systems use brackets that attach directly to the deck frame or fascia.
Stainless steel cable railing is the minimalist’s choice. Horizontal cables (typically 1/8-inch or 3/16-inch diameter) run through posts spaced 3–4 feet apart, with a turnbuckle or swage fitting at each end to tension the cable to around 300 pounds of force. This is critical: loose cables sag and fail inspection. Cable kits run $70–$120 per linear foot installed. The look is sharp, but drilling precise holes through posts and maintaining even tension takes patience. A drill press helps: freehand drilling invites misalignment.
For a hybrid, try vertical metal balusters (aluminum or powder-coated steel) set into wood or composite rails. Many manufacturers sell square or round balusters by the dozen, and they drop into pre-routed holes or surface-mount brackets. This combo retains some traditional warmth while cutting down on wood maintenance. Powder-coated finishes last 10+ years with minimal care, just hose them down.
Glass Panel Railings for Unobstructed Views
Glass panel railings are the premium choice when you want zero visual interruption, think lakefront decks or rooftop patios. Panels are typically 1/4-inch or 3/8-inch tempered glass, mounted in aluminum or stainless steel channels. Tempered glass is required by code: if it breaks, it shatters into small, blunt chunks instead of shards. Expect costs between $150–$300 per linear foot, depending on panel size and hardware quality.
Installation isn’t a beginner project. Panels are heavy (a 6-foot section can weigh 80+ pounds), require precise leveling, and demand gaskets or setting blocks to prevent direct glass-to-metal contact. Most systems use a base shoe channel bolted to the deck frame, with the glass inserted from above and secured with a top cap rail. Wear gloves and safety goggles, handling large glass panels is risky if you’re working alone.
Maintenance is straightforward but frequent: glass shows every fingerprint, water spot, and pollen smudge. Budget time for regular cleaning with a squeegee and glass cleaner. The payoff is an uninterrupted view and a high-end aesthetic that stands out. Many homeowners pair glass railings with projects like a DIY outdoor bench to create a cohesive, polished look.
Composite and Low-Maintenance Railing Solutions
Composite railings (PVC-wrapped wood cores or solid polymer extrusions) eliminate the stain-and-seal cycle that defines wood ownership. Brands like Trex, TimberTech, and Fiberon offer railing systems that mimic wood grain but resist rot, insects, and UV fading. Costs range from $40–$70 per linear foot for kits that include posts, rails, and balusters.
These systems snap or screw together with hidden fasteners, and most come with color-matched post sleeves, caps, and even LED lighting channels. Installation mirrors wood railing: set posts, mount rail brackets, drop in balusters, and cap it off. The difference is longevity, composite railings carry 25-year warranties and require only soap-and-water cleaning. They won’t splinter, so they’re a smart pick for families with kids or pets.
One trade-off: composite can flex more than wood or metal, especially in longer spans. Stick to the manufacturer’s maximum post spacing (usually 6 feet or less) and reinforce with blocking between joists if you’re surface-mounting posts. In hot climates, dark composite colors can get uncomfortably warm to the touch, opt for lighter shades if your deck gets full sun. Homeowners planning broader outdoor upgrades often coordinate composite railings with Barrette outdoor living fencing for a unified, low-maintenance aesthetic.
Creative Mixed-Material Railing Combinations
Mixing materials lets you balance cost, style, and maintenance in ways single-material railings can’t. A popular combo: wood or composite posts and top rail with metal balusters or cable infill. This approach keeps the handrail comfortable to grip (metal heats up: composites stay cooler) while opening up sightlines below the rail cap.
Another option: stone or masonry columns at corners or stair landings, paired with wood or metal rail sections between. Stone columns add heft and a craftsman vibe but require footings that extend below the frost line, typically 36–48 inches deep depending on region. This isn’t a deck-level DIY: you’ll need formwork, rebar, and concrete, or a mason to handle it.
For a coastal or farmhouse look, try wood posts with rope infill looped horizontally between eyebolts. Use 1-inch or 1.5-inch marine-grade rope (manila or synthetic) and wrap ends to prevent fraying. Tensioning rope isn’t as precise as cable, and it will stretch over time, so plan to re-tighten annually. This style works best on covered or partially covered decks, exposed rope weathers faster.
Creative design plans are abundant on sites like Ana White, where free plans for mixed-material projects help DIYers visualize combinations before committing to materials. And if you’re expanding your outdoor space beyond the deck, coordinating with outdoor living room furniture arrangements creates a seamless transition between deck and patio zones.
Budget-Friendly DIY Deck Railing Projects
Tight budget? You can still build code-compliant, attractive railings by shopping smart and doing the labor yourself. Pressure-treated pine is the most affordable framing material. Buy 4×4 posts, 2×4 rails, and 2×2 balusters in bulk at a home center, expect around $10–$15 per linear foot in materials for a basic baluster-style railing.
To cut costs further, space posts at the maximum allowable distance (typically 6 feet) and use pre-cut balusters instead of ripping your own from dimensional lumber. A compound miter saw makes quick, square cuts: if you don’t own one, a circular saw with a speed square works, though cuts take longer and require more care.
Another budget-friendly option: cattle panel or hog wire infill. These welded-wire sheets (commonly 16 feet long × 50 inches tall, with 4×4-inch or 6×6-inch openings) cost around $20–$30 per panel and can be framed with 2×4 rails for an industrial-farmhouse aesthetic. Cut panels to length with bolt cutters, frame them in wood, and attach with fence staples or screws and fender washers. This style has exploded in popularity thanks to features on Gardenista and similar design blogs.
Safety reminder: Even budget builds must meet code. Rails must be 36 inches minimum height (42 inches in some commercial or high-deck applications), balusters spaced no more than 4 inches apart, and the railing must withstand a 200-pound concentrated load or 50 pounds per linear foot distributed load applied at the top rail. If your deck is above a certain height (varies by jurisdiction, often 30 inches), you’ll likely need a permit and inspection. Many homeowners also integrate RTA outdoor living kits for coordinated pergolas or shade structures, tying together the entire backyard project.
Conclusion
Railing choice shapes how a deck functions and feels. Whether you prioritize zero-maintenance composites, the clean lines of cable, or the classic warmth of wood, the right system balances code compliance, budget, and long-term upkeep. For additional project plans and inspiration, Fix This Build That offers detailed railing tutorials and material breakdowns. Measure twice, check local building codes, and don’t skip the permit if your deck height or design requires one.